Sunday, May 25, 2014

Imagine Your Journey Hanging - Altered Film Strip Box

By now you would have seen the gorgeous film strip boxes that the other ladies have made. They are stunning.  Of course by now you have to expect that I would do something a bit different.  My daughter being a photographer wanted some "arty" photos taken while she was pregnant.  So we trundled to the beach and she posed and I took the photos.  We got some stunning photos and I wanted to use a couple of them in this project. I wanted the project to convey the natural organic feeling captured by the photos.  Here is the finished project, although the photo does not really do the project justice.


So to begin.

Here are the original pieces of the film strip, they fit together to make the film strip box.


I got a very sharp craft knife and cut up the pieces to make separate boxes.


I then took a placemat which I sanded and painted with white gesso.
 

After painting the placemat I used Modge Podge and covered the placemat with torn book pages.


Using more modge podge I covered the placemat with a green serviette and then over the green serviette I modge podged another serviette with birds and butterflies over the left half of the placemat.
 

With the placemat covered I then painted the film strip box pieces with black acrylic paint.
I also painted a few small wooden blocks I had in my stash with the same paint.


Using distress inks I inked up a dictionary page, and using stencils I added some circles using black distress ink. I then cut the pieces to fit the inside back of the box and the insides.


I then decorated the box, using die cuts, a chipboard butterfly and corner flourish.  The bird is from the Imagine If range, I used a button from my stash and a quote :Imagine your Journey".  Around the outside of the box I used some Dresden trim. I covered the outside edges of the box with aluminium tape that had been embossed and painted.  Once the paint was dry I sanded some of the paint off.


I embossed the butterfly, the bird and the flourish with embossing powder.  On the fence die cut I used crackle glossy accents.

 
I created a flower using  embossed,painted and sanded soda can metal.  Ithen cut out the flowers using the Tim Holtz tattered flower die.  I layered the flowers together to make the bloom.  I then made a few other embellishments using Coutoure Creations Dies.  I painted some of the stars from Imagine If and covered them with blue glitter.   I covered a piece of black card with black and white script tape to put behind the box.


For the photos I painted the film strips with green metallic paint.  I then used the heat tool and heated the paint until it began to bubble to give it a bit of texture. I then rubbed over the paint with gold and black rubon.


I then put the photos in behind the strip and filled in the holes with glossy accents.Using black card I made a hinge to hold both photos and glued it to the top of the box as illustrated. The photos are glued on an angle on the top of the box. I added the other embellishments and put it all together.   I hope you enjoy this project please feel free to leave comments or ask questions.  Now I am off to make something with the remaining pieces of the film strip box...........
 
Ngaere


Saturday, May 24, 2014

Owl Journal

Here is a little journal that I have made using a recycled book, manila folders and lots and lots of Imagine If products.

Here is the book before I got started on it.

 
After covering the book inside and out with scrapbook paper I then used these Imagine If materials on the covers. I loved the orange doily and thought it would look great as a moon behind the owl.  The chipboard owl I painted white and distressed with Vintage Photo distress ink,


Here is the finished cover. Isn't it kind of cute?.

 
I then cut up a couple of manila folders and folded them, inked and stamped them and added more Imagine If products to them and used them as dividers in the journal.


I then cut watercolour paper to make signatures incorporating the manila folders, inserted them into the book and used a pamphlet stitch to bind them into the cover.


I used a button off an old pair off jeans to make a handle and used a hair tie closure for the book.  This is a cute little journal with pockets and tabs, plenty of pages to write your thoughts and lots of inspirational quotes from the Imagine If "Had Enough?" quote sheet.

Materials Used

Imagine If  "Had Enough?" printed quote sheet
Imagine If Owl
Imagine If Koru Set
Fix Design Felt Monarch butterflies
Fix Design Geckos
Fix Design Card cutouts Bare Trees
Fix Design Felt Doilies
Fix Design Flying Birds
Recycled Book
Scrapbook paper
Star Brads
Watercolour Paper
Manilla Folders
Assorted Stamps and Inks
Binding Twine
Button
Hair Tie

Thursday, May 15, 2014

Fairy Hanging

When Jo sent out the fairies I thought long and hard about what I wanted to do.  I had already painted the fairies black on my layout and I wanted to do something a little bit different than dressing them up and making the traditional fairy.  Plus (and I love it) Jo is always encouraging us to step outside the box and I took her at her word.  Here is the finished piece.


So the longer I looked at the fairy the more I wanted her to appear magical but could not decide how I was going to achieve it.  Finally I found a calendar that I had been given a few years ago with the most stunning fantasy art.  One of the pictures in the calendar was a beautiful unicorn and an image of an Oakman.  I glued the unicorn image on to the fairy and once the glue had a chance to dry I carefully cut around the shape then sanded all of the edges.  I then coated the fairy with a layer of crackle medium to give her a slightly rough weathered look and rubbed in burnt umber oil paint to further weather her.

 
The image on the left is the fairy before I weathered her and the one on the right is the finished fairy.
 
So I had the fairy.  The next step was to take some MDF dominoes that I had in my stash (some say hoard) sanded them and glued the picture of the Oakman over the top of them. I then cut them apart sanded all of the edges and painted them black. Oh, and I also took a cork backed placemat and sanded it and painted it black.  These placemats are a really great alternative to canvases and they are so cheap to buy at second hand shops.  If the cork on the back is not the greatest use a razor to remove it and you are good to go with paint or paper. 


Once the glue and paint dried I again use crackle medium and burnt umber paint on the Oakman to give it an aged weathered look.
 
I then modgepodged the Imagine If green bazil flourishes on to the painted placemat and inserted two metal eyelets at the top of the hanging to attached cords for hanging. (please excuse the flash reflection in the picture). 


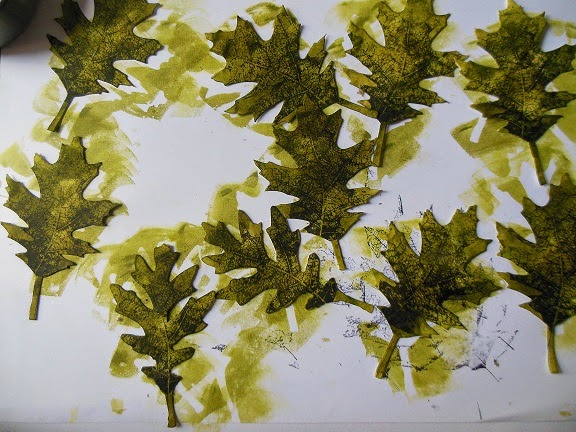
Using the Tim Holtz Tattered Leaves die I cut leaves out of white card and black card.  I then randomly stamped the white leaves with the Stampers Anonymous Falling Leaves stamp. 


I coloured the leaves using Distress Inks in various shades of green and glued each white leaf to a black leaf.  I then spattered them with white paint.


Once the leaves were glued and dry I scrunched them up then opened them out again to give them some shape and texture.  I then assembled the hanging and added the word 'Magic" up the side of the placemat and popped in a little ladybird for a bit of colour.
 
This is a quick little project that can be done with patterned paper instead of calendar images.  The idea is take Jo's amazing products and have a play, make them your own and try something a bit different now and then. That is how we learn and grow.  Hope you enjoy this project.
 
Regards, Ngaere
 
Materials Used
 
Imagine If Fairy and Butterfly Large
Imagine If Bazil Flourishes
White/Black cardstock
Distress Inks
Images
MDF Dominoes
Placemat
Acrylic Paint Black
Crackle Medium
Oil Paint Burnt Umber
Chipboard Letters
Metal Eyelets
Ladybird button


Wednesday, May 7, 2014

"Believe in Magic" Layout

With this month's releases from Imagine If we have owls and fairies and boxes oh my!  I have been inspired by all of the lovely ladies on the design team, there have been some amazing projects using Jo's great products.  I have also been inspired by the birth of my youngest grandson.  Olley was born in March this year and he is just so cute.  It seemed to me that magical fairies could be used on a boy's layout just as easily as they could on a girls layout.  I preferred to keep it clean and simple, leaving the photo and the chipboard to be the stars of the layout.


I cut around the bottom of the picture to give it some shape, then I layered the photo on top of two strips of patterned paper which I adhered to white embossed 12"x12" card.  The strips of paper help to anchor the picture.  I put the memories overlay from Imagine If over the photo framing Olley. This pulls your eye to his cute little face and provides a frame for the stars to twinkle on. I then painted the fairies black and the stars and the moon yellow.  I added gold glitter paint to the moon and stars and silver glitter paint to the fairies wings.  I then painted the back half of the mushroom white, the cap red and glued them together.  I painted the grass green and added it to the bottom of the mushroom.

 
I used a gorgeous quote from the Imagine if Fairies and Castles quote sheet, added a title using Tim Holtz Off the block diecuts and the layout is finished.


This is a very simple layout that I think showcases the Imagine If chipboard pieces beautifully and it would work just as easily for a little girl.  I hope you enjoyed this project and that it inspires you to try something similar for yourself, keep an eye out for the rest of the Design Team projects coming up this month they are stunning and well worth taking the time to check them out.

Products Used in this layout
Imagine If Fairies and Castles quote sheet
Imagine If Fairy on the Moon small with stars
Imagine If Fairy and a rose small
Imagine If Memories frame
Imagine If Mushroom
White embossed 12x12 cardstock
Patterned paper scraps
Acrylic paint
Glitter paint
Tim Holtz black distress ink
Tim Holtz Off the Block diecut alphabet

Monday, May 5, 2014

Wedding March

This is my latest project using the Imagine If chipboard small shoes.  These are the little shoes that Jo has designed for smaller projects.  I was looking at Pinterest and wedding favour boxes seem to be all the rage overseas so after giving it some thought I have made this simple project using one of the small chipboard shoes.


To begin I started with a small box that used to house a glass ornament.


I covered all sides and the top and bottom of the box with Kaisercraft  Fairy Tales                      paper.  I inked all of the edges of the paper before glueing them to the box leaving a small border.


I also covered the inside of the box base and lid.

 
I cut two die cuts from white card using  the Couture Creations  Moments in Time die.  I glued one to each long side of the box wrapping it around the side.  I then cut further dies cuts from white card using the Couture Creations Kaleidoscope Heart die and the Couture Creations  Tranquility flourish   die.  These I glued to the lid.


I gave the whole box a coat of modge podge to seal the papers.  I then wrapped ribbon around three  white roses from the Imagine If/Fix Design NZ design team kit and glued them to the top of the box.  I covered the shoe with Tim Holtz Distress Ink, Dusty Concord, and then while the ink was still wet I sprinkled on Aourua Opals.  With a heat gun I melted the opals and added another couple of layers to get the effect I wanted.  I added small gemstones to the heel and the toe of the shoe. Using an awl I made holes on each side of the ankle and threaded gold thread through and tied it in a bow.  To finish the piece I painted a chipboard butterfly white and then covered it with crystalline Kindy Glitz to give it some sparked.  I glued the butterfly to the stems of the roses and the box was complete.  Just a simple little project but very effective. 

Thank you for reading this post and please don't forget to leave a comment or ask a question. 

If you like the projects that the Design Team have made this month wait until you see the next lot of projects they are stunning.

Regards, Ngaere

Materials used in this project

ImagineIf/FixDesign NZ Cardmakers Mini Heels
ImagineIf/FixDesign Chipboard Card Cutout Butterflies
ImagineIf/FixDesign White Paper Roses
Recycled box
Kaisercraft  Fairy Tales paper
White card
Couture Creations Dies, Kaleidoscope Heart, Tranquility Flourish. Moments in Time Flourish
Ribbon
Tim Holtz Distress In Dusty Concord
Opals-AuroraGlue/Modge Podge
Gold cord
Kaisercraft gems
Tim Holtz Chip Block Alphabet die