Thursday, December 10, 2020

Christmas Drawers - Faith Pocock Design Team Project December

 As a second project for Faith Pocock Craft Studio Ltd I have altered a set of MDF Drawers.  This is quite a large project. and measures 38cm x 38 cm and is 9cm deep.  Each drawer measures 8.5cm high x 8.5cm wide and 8.5cm deep.  There is some room inside the drawers for some serious sized gifts so it is possibly a good thing that there are only 12 drawers.  


Here is the process for assembling and decorating the unit.

I began by assembling the whole unit (without glue) to make sure that I knew where everything went and to check that everything went together easily.  Because of the precision of Faith's cutting all of her pieces fit together easily and well.   I then disassembled the unit and began to decorate it.

When using paint on these projects it pays to use only a thin layer of paint.  Use a sponge to put the paint on as it will change the fit of the pieces if you layer the paint too thickly.  Make sure that you do not paint the tabs and slots on the pieces as it does make it hard to put things together if they get covered in paint.

To begin I used texture paste on the inside back of the unit, making sure to avoid the slots.  I then sponged on chalk paint - Passion for Paint - Magic Carpet Ride (Blue) from Verdigris Creative Studio,  This paint is perfect to use with these MDF projects as they can be applied directly to the MDF and there is no need to undercoat the MDF first.  It goes on thinly and dries quickly.  Sue at Verdigris makes her own chalk paint and names them all after songs, how cool is that.. Once the paint had dried I sanded everything back and then I applied Decoart Antiquing Cream - Brown to tone the blue down a bit and provide a contrast to the blueness of the drawers.


I then painted and sanded the the shelves  of the unit using the Passion for Paint Chalk Paint - Magic Carpet Ride and assembled them using a good tacky glue. 


Once the unit was assembled I used texture past through a stencil on the top and both sides of the unit. Once the texture paste was dry I painted these pieces with the Passion for Paint chalk paint - Magic Carpet Ride - blue , let it dry, then dry brushed the top and sides with the Passion for Paint chalk paint - Running on Empty (off white).
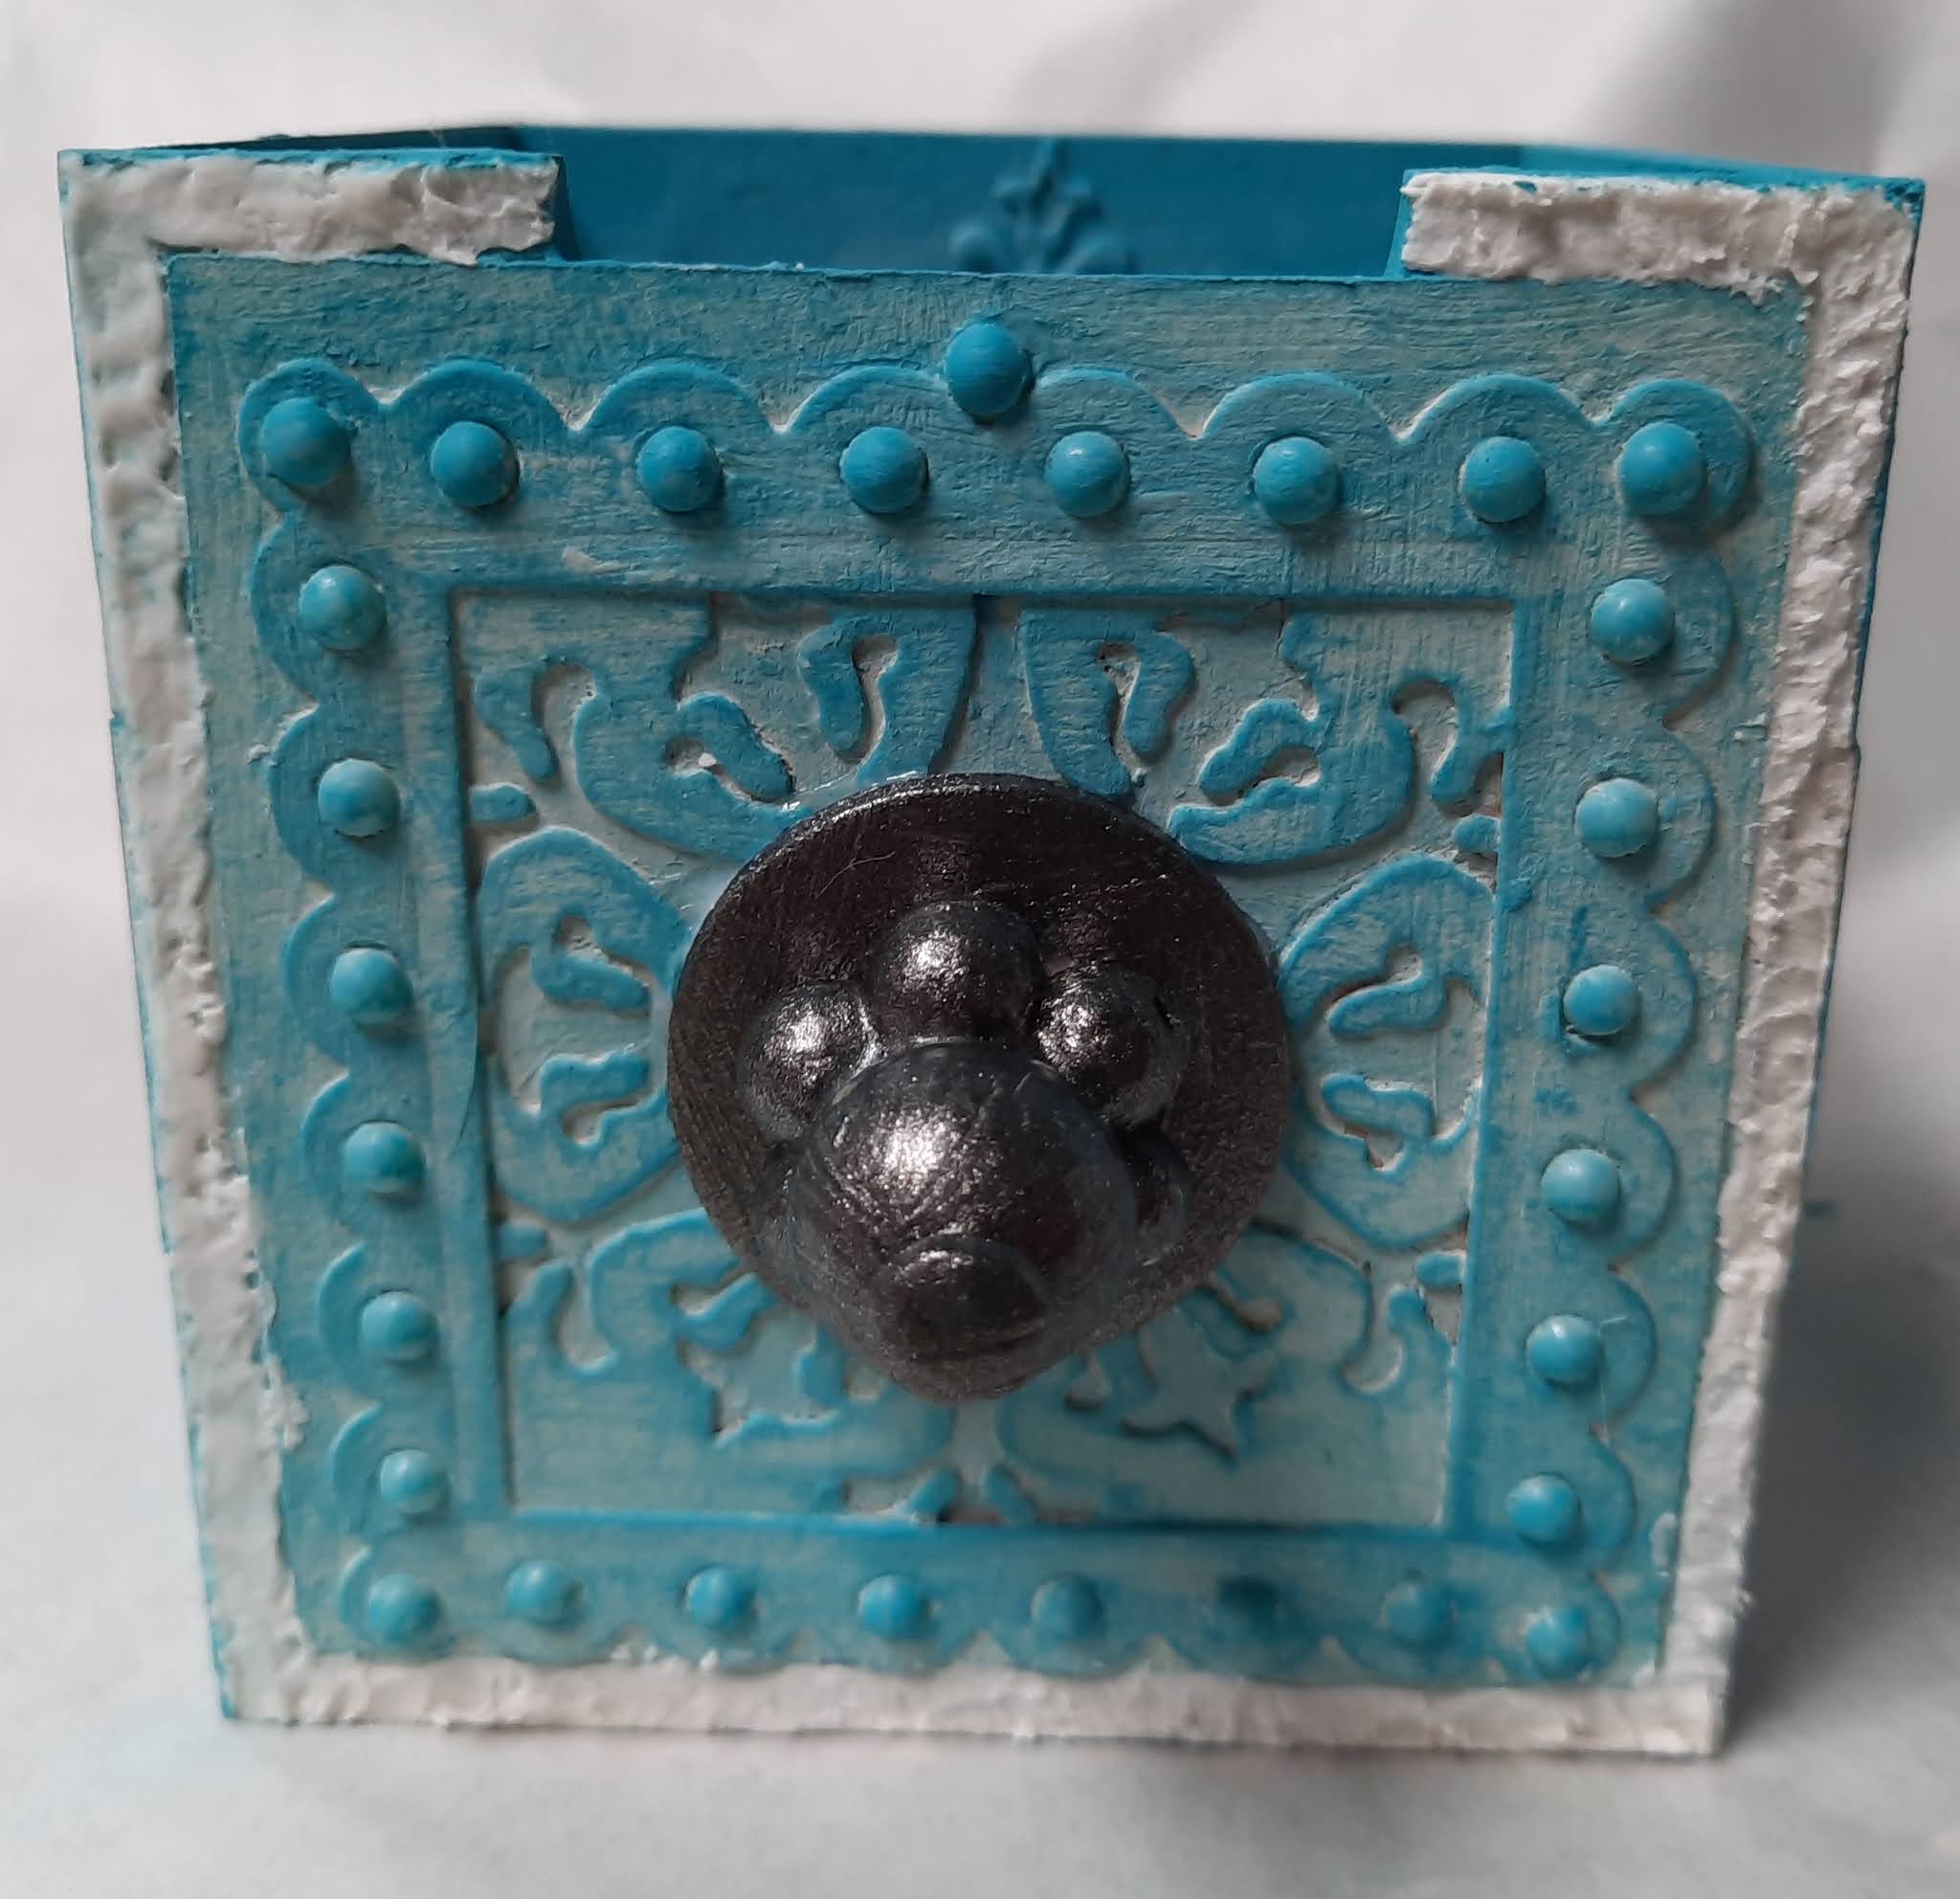

In order to break up all of the blue I die cut some hinges, added some half pearls, gessoed everything with black gesso and then used the DecoArt Mettalic Lustre Black Shimmer wax over the top.  I glued these to both sides, the top and inside the niche of the unit.

I then began work on the draw pulls.  The drawers have a half circle cut out of the front of the drawers to make it easy to pull the drawers open but I wanted to put draw pulls on the drawers. To make these I used a bunch of beads from the $2 shop, some brads and chipboard circles.

Beads 

Round beads glued to ring of beads

Brad glued into the hole at the top of the large beads then painted with gesso


Changed my mind and painted them with Art Alchemy Sparks Raven Black paint and glued them to a chipboard circle which I also painted black. I was not sure which colour I was going to use but in the end I went with the black.

Once painted I used Art Alchemy Metallique Wax "Brushed Iron" wax over the top of the paint. 

With the drawer pulls completed  I then began work on the drawers

First I diecut a lot of snowflakes as I had decided that I wanted to decorate the inside of the boxes. So that is three of each snowflake for every box. For anyone who is interested that that is a lot of diecutting.  When I finished die cutting the snowflakes I had a lot of die cut negatives  left so I decided to use those to give a filigree look on the front of the drawers. I squared them up and then I also cut a scalloped frame using the Spellbinders nesting frame dies.  Then came the gluing and there was a lot of gluing. I glued half pearls around the scalloped edge of each frame on the front of the drawers.


I painted the inside panels of the drawers with Passion for Paint chalk paint - Magic Carpet Ride and then dry brushed them with Passion for Paint chalk paint - Running on Empty


Once the insides were dry I assembled the drawers. I pained the outsides of the drawers in blue.  The front of the drawers I painted using 
Passion for Paint chalk paint - Running on Empty. I then dry brushed the fronts of the drawers with Passion for Paint chalk paint - Magic Carpet Ride.


I used DecoArt Mettalic Lustre Wax - Black Shimmer  to brush lightly over the pearls to break up the blue.  I then used modelling paste to go around the edges of the drawer front, again to break up the blue and to hide the joins in the drawer.


Having finished with the drawers I painted two MDF snowflakes which I layered one on topof the other and made three candles for the niche in the unit painting them with Passin for Paint chalk Paint Wrapped in Red.  I die cut and painted leaves to wrap around the candles (see my Christmas lantern post on how to make the candles).  I added some small Christmas bells and an MDF "Merry Christmas" painted with Art Alchemy Sparks - Raven Black paint..

I glued some chipboard letters together, painted them with crackle paint and then wiped them over with the Decoart Antiquing Cream to grunge them up a bit. I added some die cut trees and a deer and I assembled everything in the niche.  I added tea light candles into the candles and the whole thing was finished,


This is a great unit to make and could be made as a storage unit without the Christmas accoutrements.  The drawers are deep and can hold a lot so it could be decorated for use in an office or a craft room or to store jewellry.  It is a strong sturdy unit and it goes together very easily.

I hope this encourages you to try your hand at making one of these units yourself.  


Sunday, December 6, 2020

Faith Pocock Design Team Project - Christmas Lantern

 Hello everyone.  Here is my first design team project for Faith Pocock Craft Studio Ltd. Faith has an amazing range of laser cut MDF kits that she sells from her website and at various craft shows.  Faith can also be found on face book at Faith Pocock Facebook.

Faith has a talented team of designers working with her products and I am proud to be included in her design team.  Check out Faith's Facebook page to see what the other team members have been making.  The projects are fabulous and very inspiring.

For my first project I have made a small Christmas lantern from one of Faith's MDF Kits. The finished project measures 23cm high x 35 cm around the project.  It also has a door that opens and closes. The kit can be found here: Mini Lantern and can be ordered on line.


Here is the finished project with instructions for completing the project.


To begin I painted the pieces of the kit with black gesso being careful to not paint over the tabs or the slots as this will make it hard to assemble later.


I then put small paper roses into the windows at the top of the lantern. 


I assembled the top pieces, and added ball chain around the base of the windows and on the top piece covering the windows.

I wrapped twine around the handle and added a rose on each side of the handle. I glues some decorative brads around the handle and used some dimensional stickers to add dimension.  If you do not have stickers then you could used diecuts to get the same result.


Once I was happy with the way everything looked I painted everything with Art Alchemy "Sparks" paint to give the piece the look of wrought iron.

I then began work on the inside of the lantern.  I made a candle from a piece of paper towel tube.  I ripped the top of the tube to make it look like the candle had melted and I glued tissue paper to the tube to give it a bit of texture and I glued a piece of card insdie the tube to hold the small battery operated candle. I then used a glue gun to make the "drips".  Once everything was dry I painted it with white gesso.


I glued a red recycled Christmas Ornament to the inside base of the lantern.


I then glued the candle to the base, added some holly leaves, some small bells and a wooden Merry Christmas painted with Art Alchemy "Ruby Red" paint.

Once I had assembled the inside components I then painted the remaining pieces with Art Alchemy "Sparks" paint and assembled three of the sides, I inserted the candle and base into the lantern as shown and then I assembled the remaining sides.


On each side piece I added metal leaves and resin flowers which I painted with black gesso then painted again with Art Alchemy "Sparks" paint.  I glued these to the lattices at the bottom and on the door to make a door handle.  


Once everything was assembled I dry brushed the whole piece with Lumiere "Brass" paint added small touches of Art Alchemy "Ruby Red" paint to the roses and flowers, put a battery operated tea light into the candle and the project was complete.  

This was such a lovely kit and it was so easy to assemble and decorate.  


Saturday, December 5, 2020

Book Art Studios Book Camp 2020

 I had a wonderful time this week up in Auckland.  Awesome location and some very inspiring people. While I was there I made a few books and met some fabulous ladies who are all very talented. I learn't some new printing techniques which I will play with a little more. Thanks to Jo and LIz Constable for their teaching and inspiration.  Liz can be found at Book Art Studios and Jo at The Design Space.

Here are the books that I made while I was at camp.  


"Weeds"

This book is made from a recycled cereal box.  It has 9 signatures with 5 pages in each signature.  It is filled with hand dyed paper.


"Shrooms"

The second book is also made using a recycled cereal box. This book measures 16cm x 12 cm with a 5cm spine.  It has nine signatures with a total of 216 pages. This has been covered with hand dyed eco print paper and a coffee stained doily.  Inside the book I have used hand dyed paper, eco print paper and old book pages from a botanical reference book. Throughout the book there are images of mushrooms and toadstools on some of the pages.


Book 3 - Never Stop Exploring

This is another recycled cover.  The book measures 13.5cm x 21cm with a 6cm spine.  There are 7 signatures with a total of 140 pages.  The pages are all hand dyed,  The books has been covered in coffee dyed calico on the outside and inside I have used recycled pages from a botanical book.  The spine has been stitched in colours to match the inside pages and I have attached wooden butterfly buttons to the spine for added interest.  On the front cover I have used die cut leaves and more wooden butterflies for decoration.


Book 4 - Fern

This little book is made from recycled packaging (Jelly crystal box).  It measures 7cm x 8.5cm with a 3cm spine.  It has four signatures of handmade paper made from recycled envelopes and teabags and has 64 pages.  I have used napkins to cover the book and it has a calico spine.


Book 5 Oddities

This little book measures 17cm x 10.5cm with a 4cm spine.  This book is bound using staples and offcuts from a purse handle.  It has 5 signatures of hand dyed paper with 100 pages. On some of the pages I have sewn on stamped images collaged with various papers and die cut offcuts.