Hello everyone. Here is my first design team project for Faith Pocock Craft Studio Ltd. Faith has an amazing range of laser cut MDF kits that she sells from her website and at various craft shows. Faith can also be found on face book at Faith Pocock Facebook.
Faith has a talented team of designers working with her products and I am proud to be included in her design team. Check out Faith's Facebook page to see what the other team members have been making. The projects are fabulous and very inspiring.
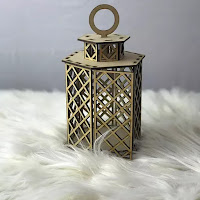
For my first project I have made a small Christmas lantern from one of Faith's MDF Kits. The finished project measures 23cm high x 35 cm around the project. It also has a door that opens and closes. The kit can be found here: Mini Lantern and can be ordered on line.
Here is the finished project with instructions for completing the project.
To begin I painted the pieces of the kit with black gesso being careful to not paint over the tabs or the slots as this will make it hard to assemble later.
I then put small paper roses into the windows at the top of the lantern.
I wrapped twine around the handle and added a rose on each side of the handle. I glues some decorative brads around the handle and used some dimensional stickers to add dimension. If you do not have stickers then you could used diecuts to get the same result.
Once I was happy with the way everything looked I painted everything with Art Alchemy "Sparks" paint to give the piece the look of wrought iron.
I then began work on the inside of the lantern. I made a candle from a piece of paper towel tube. I ripped the top of the tube to make it look like the candle had melted and I glued tissue paper to the tube to give it a bit of texture and I glued a piece of card insdie the tube to hold the small battery operated candle. I then used a glue gun to make the "drips". Once everything was dry I painted it with white gesso.
I glued a red recycled Christmas Ornament to the inside base of the lantern.
I then glued the candle to the base, added some holly leaves, some small bells and a wooden Merry Christmas painted with Art Alchemy "Ruby Red" paint.
Once I had assembled the inside components I then painted the remaining pieces with Art Alchemy "Sparks" paint and assembled three of the sides, I inserted the candle and base into the lantern as shown and then I assembled the remaining sides.
On each side piece I added metal leaves and resin flowers which I painted with black gesso then painted again with Art Alchemy "Sparks" paint. I glued these to the lattices at the bottom and on the door to make a door handle.
Once everything was assembled I dry brushed the whole piece with Lumiere "Brass" paint added small touches of Art Alchemy "Ruby Red" paint to the roses and flowers, put a battery operated tea light into the candle and the project was complete.
This was such a lovely kit and it was so easy to assemble and decorate.


No comments:
Post a Comment