Jo at Imagine If has made a NZ themed Merry Go Round
Brenda has made a fun boy's Merry Go Round
Katrina has made an amazing Christmas Merry Go Round
Jo is giving away an undecorated Merry Go Round with horses to everyone who leaves a comment on the blogs. If you want lots of chances to win enter a comment on every single blog and be in to win. Click on the rafflecopter link at the bottom of this post to leave your comments.
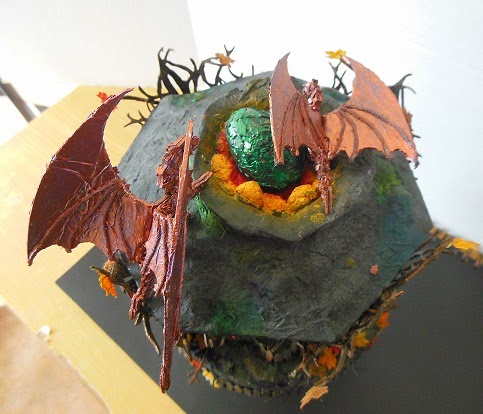
As usual I have taken a walk on the dark side for my project. I am not going to give a step by step tutorial for this project as it is too big so I will just hit the highlights. Here is the final project made with the fantastic chipboard pieces provided by Jo at Imagine If.


The Carousel does not come from Jo with a slide out drawer I made that myself while assembling the pieces. I thought it would be nice to add a little album so I cut out a piece of the base and using mat board I cut sides and a back piece and glued them to the inside of the base.

I then cut a base and sides and attached them to the front piece of the base that I had previously cut away to make a pull out drawer. I did not put a back on the drawer as the mini album is glued to the bottom of the drawer and the spine serves as a backing piece. The album opens from within the drawer.

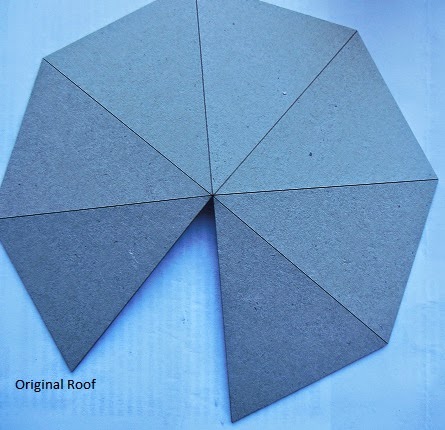
The other thing I changed was the roof of the Carousel. If you check out the other blogs you will see that the roof comes to nice point. I wanted dragons to nest on my roof so I cut out a circle from the top of the roof. I then assembled the roof and put a piece of egg carton inside the hole I had made. Using white gesso and tissue paper (the kind you use for colds) I then covered the whole roof and "nest". I also wet the tissue with the gesso and rolled it into rough balls to make the "rocks" for the inside of the nest. I also used clumps of tissue soaked in gesso to give the roof some lumps and texture. I wanted the roof to resemble a mountain top.


Once the gesso was dry I used various paints and sprays to colour the roof and I made a dragon egg using a plastic egg and crushed eggshell to sit inside the nest.


While the roof was drying I went on to decorate my chipboard dragons. Firstly I painted the dragons black then I covered the wings with modge podge and tissue paper. The tissue I used here is the type used to wrap presents not the "blow your nose" kind that I used on the roof. This method gives the appearance of leather when it is painted and that is the effect I wanted for the wings of my dragons. I added pieces of string on the wings to make veins in the wings and set it all aside to dry.


Deciding I wanted some texture on the body of the dragons as well I glued crushed eggshell to the chipboard and when everything was dry I trimmed the wings and I painted the whole thing with metallic paint. Here you can see the "leathery" texture of the wing.

I then glued the two sides together and folded the wings to get my 3D dragons. the great thing about the chipboard that Jo supplies is that is very easy to manipulate into shape and it does not fall apart. Here are the finished dragons.

Once the roof was done I stencilled tissue paper with a branch stencil then wrapped it around the central pillar of the Carousel. I then built up the graveyard around the pillar, using more of Jo's chipboard elements. I used gravestones, an owl, bats, branches, birds. a cat and pumpkins. I then enclosed it all in a die cut fence.


I used tissue and gesso on the base of the Carousel and then once it was painted I put it together with the roof. I used bamboo skewers inside straws as the supports for the roof. The straws were covered in tissue paper and gesso and then I glued chipboard trees to the front. I punched out leaves from paper towels I have previously used to mop up excess distress ink from another project. These I glued to the branches and dropped around the base of the tress along with bits of branches. I then painted up some mice and rabbits, made a sign telling the unwary to keep out added a base to the whole thing, a drawer pull for the mini album and the whole piece was finished. Whew. Whether you want to walk on the dark side or try one of the beautiful carousels decorated by the other members of the Imagine If design team this is an amazing project and it is so easy to put together and the sky is the limit when decorating it especially with the huge range of chipboard elements Jo has available. I urge you to check out the other blogs you will be blown away.
Till the next time, Ngaere.
a Rafflecopter giveaway
How clever you are to add the drawer and you decorated the piece wonderfully. Great job.
ReplyDeleteThank you Jean this was so much fun to do and the merry go round was so easy to assemble. Hope you want to give it a try and would love to see the result if you do.
DeleteWow! That is one totally wicked Carousal!! I love that it has an alum hidden inside.
DeleteThis is amazing well done you clever lady!!
ReplyDeletewow, so many techniques, amazing
ReplyDeleteOh my word! You have put so much into this Ngaere! You are simply amazing!
ReplyDeleteI can see you've put a lot of work into this! Well done!
ReplyDeleteanother very different idea. I love the drawer and mini album
ReplyDelete