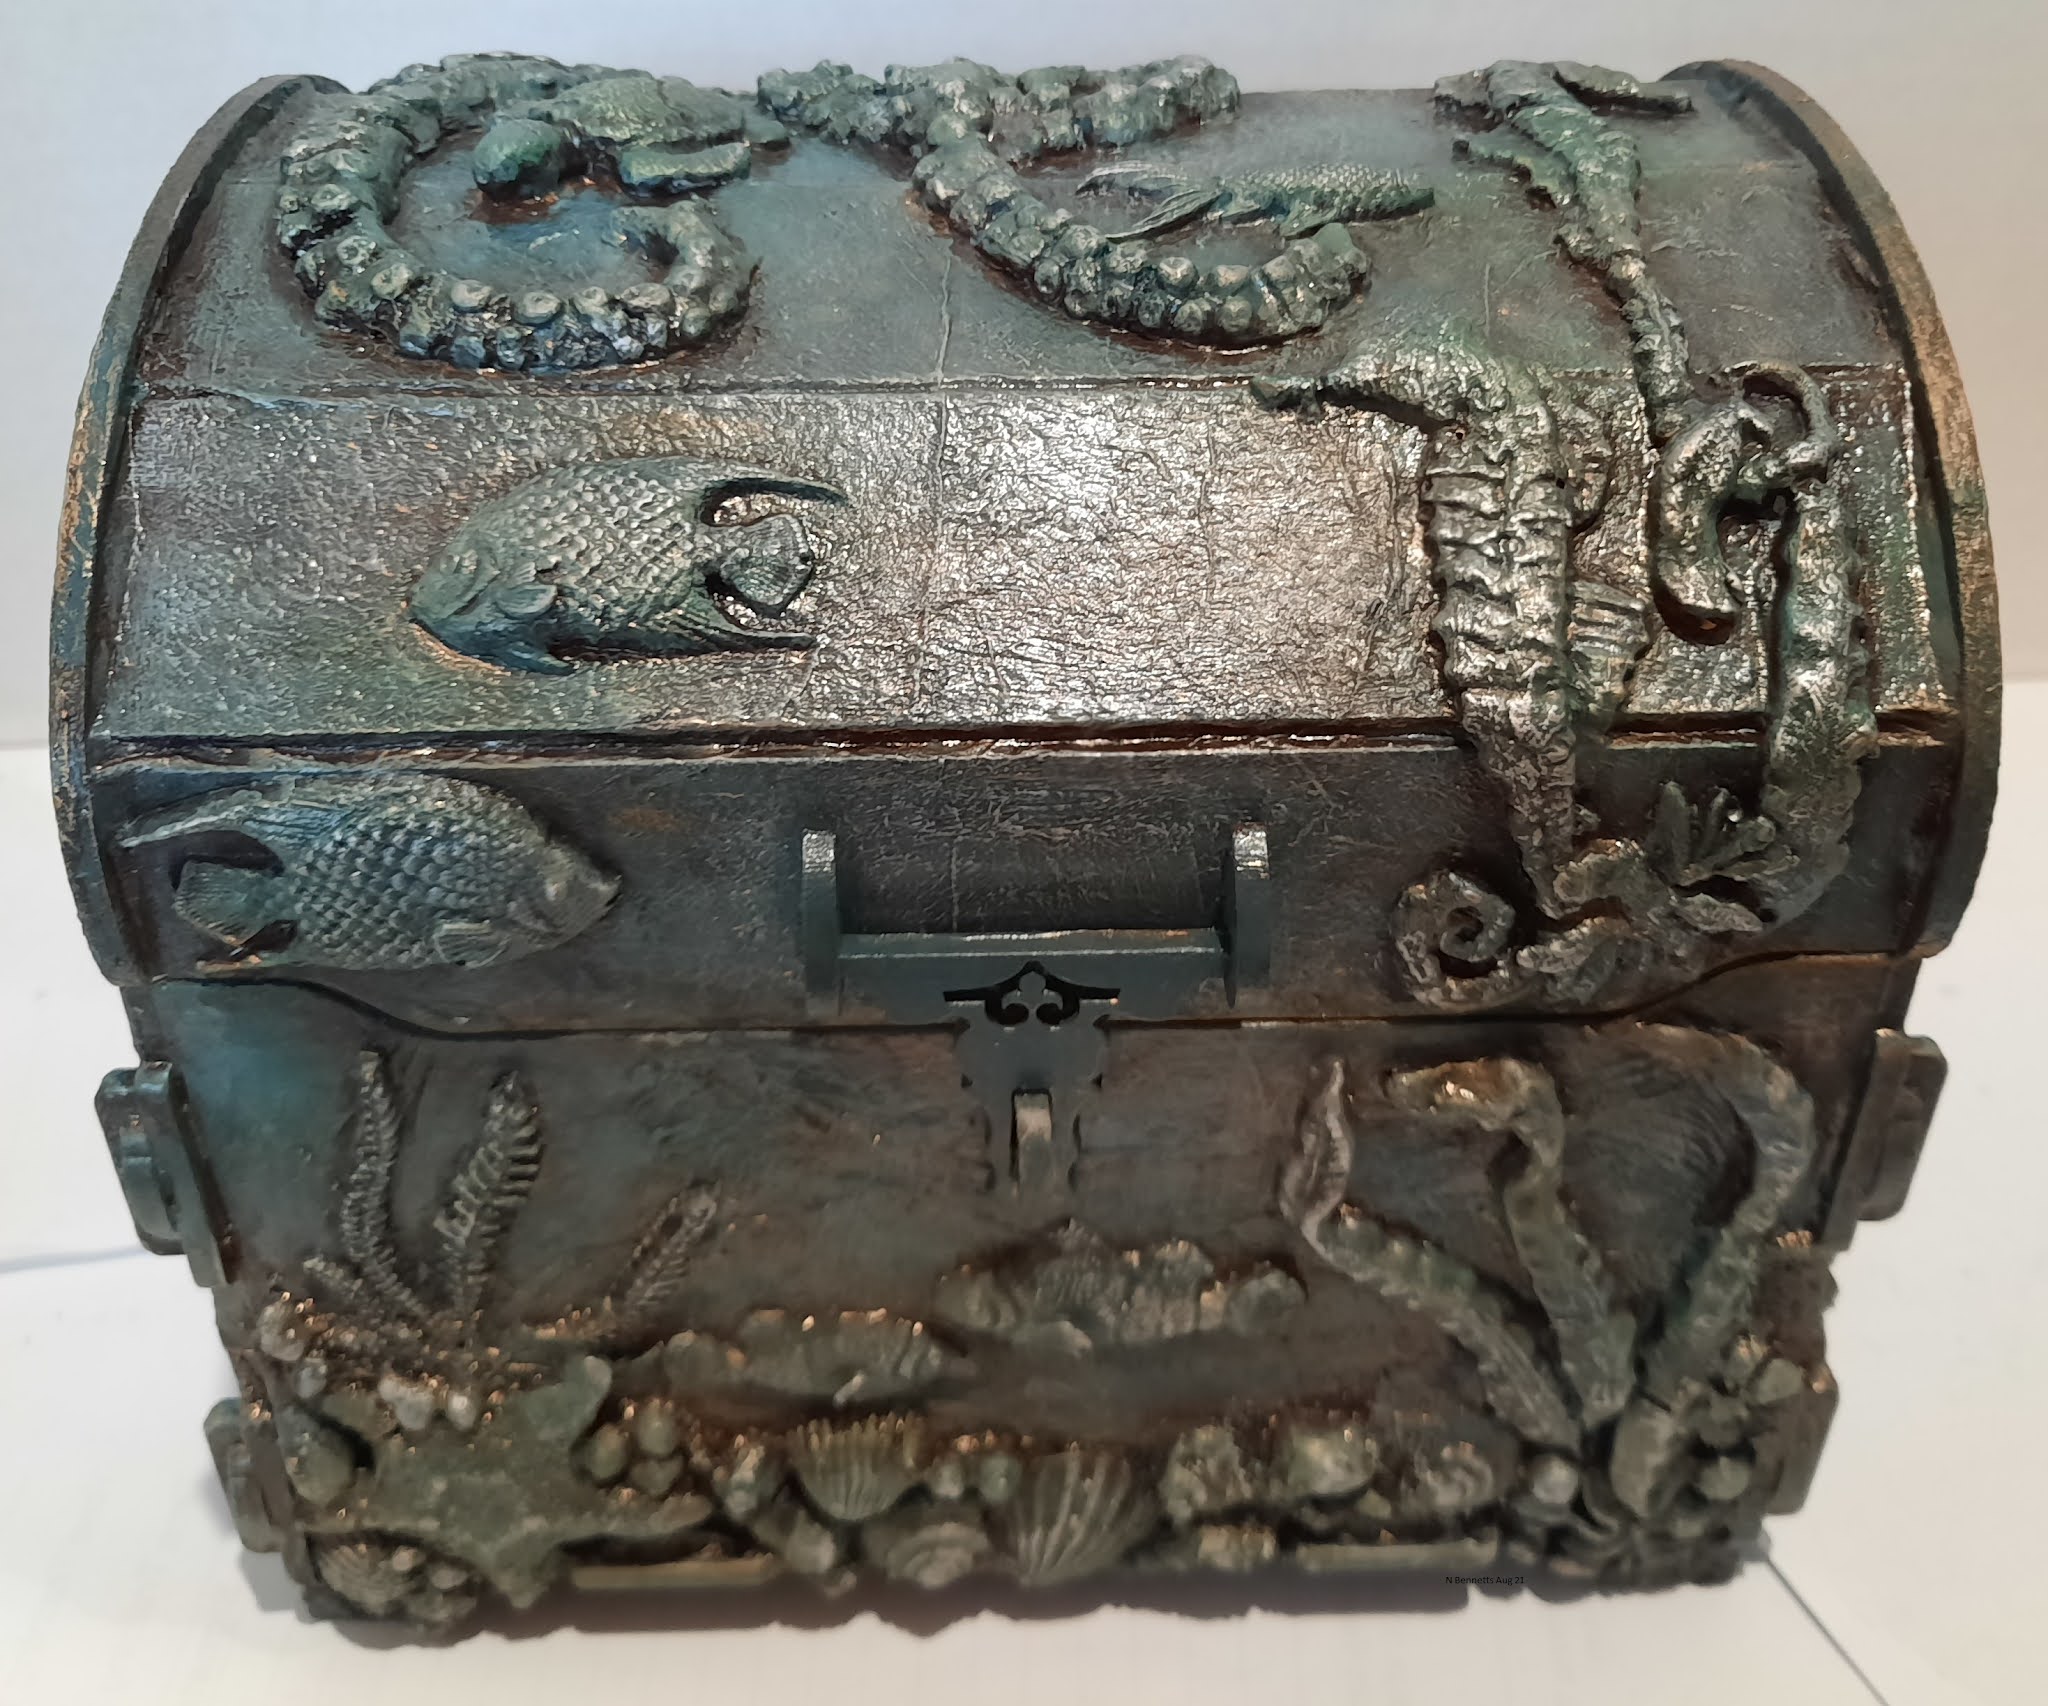
This month I have used one of Faith's kits to make an Under the Sea Chest. I used molds to decorate the chest, and various paints and waxes.



Here is the basic kit before decorating.


This month I have used one of Faith's kits to make an Under the Sea Chest. I used molds to decorate the chest, and various paints and waxes.
This project is a combination of two kits from Faith Pocock Craft Studio. The base is one of Faith's book boxes containing a drawer and the other is a small set of shelves.


These are the two bare units before I began to decorate them.


I painted the pieces with ivory chalkpaint. On the shelves I stencilled a design using grey chalkpaint. I then used a wash of burnt umber paint over the top. I edged the pieces with black chalkpaint and then sealed everything with a topcoat of varnish. On the sides of the shelves i used modelling paste through the same stencil I had used on the inside shelves. For the base I glued on four cotton reels for feet (everything looks cuter with feet) and painted the inside of the drawers with ivory chalk paint.
Using the same stencil I had used on the sides of the shelves I stencilled the top of the book cover and the front of the drawer. I then painted everything with white ivory chalk paint and then used the same paint colours I had used on the shelves to build up the colour.
I glued the shelves to the book cover.
I then used Finnabair moulds to make some resin pieces to decorate the unit. I painted all of the resin pieces with blue chalk paint, then drybrushed all of the pieces with the ivory chalkpaint. To finish the pieces I added some Finnabair rust paste.


I really enjoyed this project. It shows the versatility of Faith's kits that they can be combined to make something new.
This project is the one I made using the other half of the hot air balloon kit from Faith Pocock Craft Studio. I wanted to do something similar but different to the blue balloon I posted earlier in the month. The process is exactly the same as the blue balloon which has been detailed in my earlier blog. I just used different materials and different colours.


Materials
Hot Air Balloon Kit Small Faith Pocock Craft Studio
Chipboard Pieces Imagine If
Passion for Paint Chalk Paint Verdigris Studio
Ranger Patina Paint
Finnabair Art Extravaganza Rust Effect Paste
For this months Design Team project for Faith Pocock Craft Studio, Faith sent me a hot air balloon kit. Rather than decorate the whole balloon I cut the pieces in half and mounted the balloon inside two canvases. Here is the first version, the second version will be up on my blog later in the month.


I began by decorating the canvas. I glued embossed card around the outside of the frame then glued die cuts over the cardboard. Where the cardboard pieces joined I used upholstery pins to cover the joins. I then cut squares and rectangles from chipboard and glued them onto the canvas. The corners were made using the wooden pieces that come with the canvas to stabilise it.

I added some Imagine If chipboard pieces and them painted the whole thing with black gesso.


I then brushed on some Finnabair rust paste, using the brown rust and red rust. To make it pop a little I added some Finnabair Vintage Gold wax.
For the balloon I cut the basket and the circular pieces in half. This gave me four support pieces for each balloon half.


I then cut a piece of chipboard to attach to the back of the balloon so that I could secure the edges of the fabric that I wanted to add over the top. I cut a piece out of the chipboard so that when I glued the balloon to the canvas the chipboard would not show on the finished piece.


Once dry I painted the balloon with Blue Bayou chalk paint from Verdigris Studio and then antiqued it using Deco Art Antiquing cream.

I cut strips of cardboard from a cereal packet, painted them black and glued on half pearls to simulate studs. I then painted these and the chipboard pieces with Ranger Vintage Patina paints in rust, cinnabar and clay colours, The strips I glued to the ribs of the balloon and around the base of the balloon.


I used Finnabair moulds to make some screw heads which I added to the canvas and then I assembled everything.


Materials
Hot Air Balloon Kit Small Faith Pocock Craft Studio
Chipboard Pieces Imagine If
Passion for Paint Chalk Paint Verdigris Studio
Ranger Patina Paint
Finnabair Art Extravaganza Rust Effect Paste
Faith sent me a lovely suitcase to decorate this month, I have gone in a very different direction from what I normally do for this project. Check out the fabulous kits at Faith's on line shop Faith Pocock Craft Studio.


Here is the blank kit assembled.


The lid on this kit fits very tightly over the base so I used ink around the areas where the lid overlaps the base rather than paint which would have stopped the lid from closing properly.
I used wallpaper and wallpaper borders to cover this project.

Firstly I covered the inside edges of the suitcase with the dark leopard print paper, taking care not to cover the tabs.


I cut the brown strips off the top and bottom of the border and glued these around the base and the sides of the lid.
I inked the handle with vintagre photo distress ink and then I covered the handle with twine. The pieces on either side of the handle were also inked to look like leather and I glued small circles around the edges to make it look like rivets.
I then covered the inside of the suitcase and the inside and outside of the lid and the inner border with leopard wallpaper. I cut out the lion, leopard, and tiger heads from the wallpaper border and glued them to the outside and the inside of the lid.


To make this project extra special I then covered the lid with clear coat resin which has given it a wonderful depth and shine that looks amazing and is hard to capture with the camera.
I am pretty pleased with how this turned out and I encourage everyone to check out Faith's kits and let your imagination take flight.

